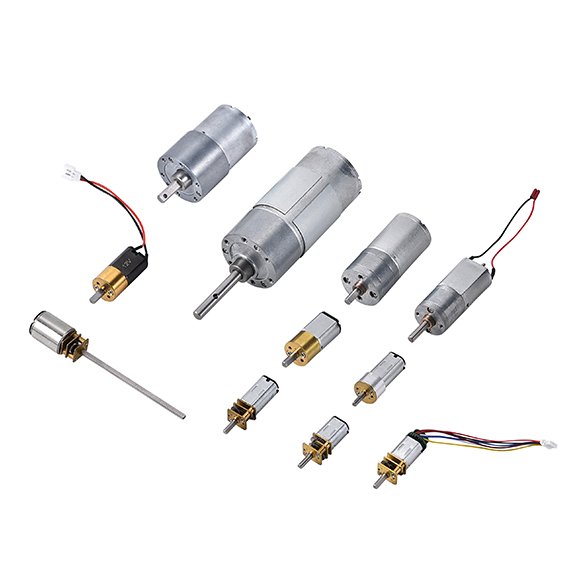
Hall sensors are important for making Brushless DC Motors work better. They detect the rotor’s position by sensing its magnetic field. This helps the motor run smoothly and gives better control. A good Hall sensor keeps the motor steady, even if temperatures change. Quick response times also help the motor switch faster, lowering noise and uneven torque. All these things make the motor more efficient.
Installing Hall sensors the right way is very important. If you align and set them up properly, you avoid mistakes and improve how the motor works. Fixing problems like bad wiring or misalignment helps the motor stay reliable and work well for a long time.
Key Takeaways
Hall sensors are important for brushless DC motors. They find the rotor’s position to keep it running smoothly.
Installing Hall sensors the right way is very important. Line them up properly to avoid noise and uneven power.
Calibrating Hall sensors often makes the motor work better. Follow easy steps to make sure they detect positions correctly.
Check sensor data to improve how the motor works. Use this data to change speed and power settings as needed.
Fix common problems like bad alignment or wiring fast. Regular checks can stop bigger issues and help the motor last longer.
Understanding Hall Sensors in Brushless DC Motors
What Are Hall Sensors and How Do They Work?
Hall sensors are tiny tools that sense magnetic fields. They use the Hall Effect, which happens when a magnetic field creates voltage in a conductor. In brushless DC motors, these sensors find the rotor’s position by detecting magnetic changes as it spins. This helps the motor controller send current to the right coils, making the motor run smoothly.
Hall sensors are very accurate and dependable. For instance, they work at 30 Gauss at 25°C, making them great for affordable systems. They always detect the rotor’s position correctly, thanks to their repeatability. Plus, they stay steady even when temperatures change, ensuring reliable performance. These qualities make Hall sensors key for controlling motors precisely.
Feature | Details |
|---|---|
Sensitivity | Works at 30 Gauss at 25°C, good for low-cost systems. |
Repeatability | Always changes state at the same rotor position, ensuring smooth operation. |
Stability | Works well across temperature changes, keeping accuracy high. |
Response Time | Reacts quickly, helping the motor run efficiently and reducing torque issues. |
The Role of Hall Sensors in Brushless DC Motor Control
Hall sensors are crucial for controlling brushless DC motors. They give real-time updates on the rotor’s position, helping the motor controller send current to the right coils. This ensures the motor runs at the correct speed and torque. Without Hall sensors, the motor would lose efficiency and stability.
These sensors also help the motor respond faster. By quickly sensing rotor position changes, they let the motor adjust to different speeds and loads. This lowers noise and prevents uneven torque, which can harm the motor. Hall sensors are especially useful in areas like robotics and medical devices, where precise control is needed.
Benefits of Using Hall Sensors for Motor Efficiency
Adding Hall sensors to brushless DC motors brings many benefits:
They help monitor and control motor speed and position accurately, improving performance.
They ensure stable torque output, which is important for tough tasks.
Hall sensors allow regenerative braking, saving energy and making motors last longer.
New sensor technology has made them more accurate, improving motor performance and cutting emissions.
These advantages make Hall sensors a smart choice for motor systems. They boost performance, save energy, and lower maintenance costs.
How to Install Hall Sensors in Brushless DC Motors
Tools and Safety Precautions for Installation
Before starting, gather tools and follow safety rules. This makes the process safe and easy. Here’s what you’ll need:
Tools:
Screwdrivers (both Phillips and flathead types)
Multimeter to check electrical connections
Soldering iron and solder for attaching wires
Heat shrink tubing to cover exposed wires
A 3D-printed ring or bracket to hold sensors
Safety gloves and goggles for protection
Safety Precautions:
Unplug the motor from power before working on it.
Wear insulated gloves to avoid getting shocked.
Work in a bright and airy space to stay safe.
Check all connections twice to prevent short circuits.
Tip: Test your tools first to ensure they work properly. This helps avoid mistakes during installation.
Sensor Placement: Aligning with Rotor Magnets
Placing Hall sensors correctly is very important. It helps the motor detect the rotor’s position accurately. Follow these steps:
Space the sensors 120 electrical degrees apart. This ensures smooth motor operation.
Put one sensor between two rotor magnets. This keeps timing accurate and avoids alignment problems.
Use a 3D-printed ring or place sensors between stator poles. These methods keep sensors steady and safe from damage.
Note: Misplaced sensors can cause problems like noise or uneven torque. Take your time to align them properly.
Wiring and Electrical Connections for Hall Sensors
After placing the sensors, connect them to the motor’s control system. Correct wiring is important for proper sensor function. Here’s how to do it:
Use a circuit with an A1302 Hall effect sensor and a microcontroller, like Arduino. This setup shows sensor readings.
Stack two PCBs for better connections. Place small parts on one PCB and the Hall sensor on the other. Use stackable headers to link them securely.
Add a DC amplifier and voltage regulator to the circuit. This improves sensor output in noisy areas.
Make sure the output is linear and proportional. This ensures accurate readings and better motor performance.
Tip: Use a multimeter to check for loose wires or short circuits. Stable wiring is key for reliable sensor performance.
By following these steps, you can install Hall sensors easily. This helps your brushless DC motor work accurately and efficiently.
Calibration Techniques for Accurate Position Detection
Calibrating Hall sensors is key to making your brushless DC motor work well. It helps the motor detect positions better, which improves how it runs. Follow these simple steps to calibrate correctly:
Prepare the Motor and Sensors
Place the motor on a sturdy surface. Make sure the rotor spins freely without anything blocking it. Check that the Hall sensors are firmly attached and lined up with the rotor magnets. Use a multimeter to confirm the sensors are working before starting.Tip: Keep the area clean and free of magnets or metal objects. These can mess up the calibration process.
Set Up a Calibration Circuit
Build a basic circuit to test the Hall sensors. Connect the sensors to a microcontroller, like Arduino, and link it to your computer. Use software to watch the sensor readings as the rotor spins. This helps you spot any problems with the sensors.// Example Arduino Code for Hall Sensor Testing int hallSensorPin = 2; // Connect Hall sensor to pin 2 void setup() { pinMode(hallSensorPin, INPUT); Serial.begin(9600); } void loop() { int sensorValue = digitalRead(hallSensorPin); Serial.println(sensorValue); // Print sensor output delay(100); }Note: If coding is new to you, look online for ready-made scripts to test Hall sensors.
Spin the Rotor and Record Sensor Outputs
Turn the rotor slowly by hand or use a low-speed motor driver. Watch the sensor readings on your computer. Each sensor should change states (high or low) when the rotor magnets pass. If a sensor doesn’t respond, check its wires and alignment.Adjust Sensor Placement
If sensor readings are off, move the sensors slightly closer or farther from the rotor magnets. Make sure they are spaced evenly, usually 120 electrical degrees apart. This spacing helps the motor run smoothly and efficiently.Tip: Use a plastic tool to adjust the sensors. This avoids damage or interference.
Fine-Tune the Calibration
After aligning the sensors, adjust their sensitivity if possible. Some Hall sensors let you change their threshold voltage. Use the microcontroller to watch the readings while making small changes. Aim for steady and accurate outputs from all sensors.Test the Motor Under Load
Once calibrated, test the motor in real-life conditions. Attach it to its usual setup and check how it performs. Look for uneven torque, noise, or instability. If problems show up, repeat the calibration steps and fix them.Reminder: Regular calibration keeps the motor running well over time. Check it often, especially if the motor works in tough environments.
By following these steps, you can make your brushless DC motor work better. Good calibration improves position detection and boosts motor efficiency, making your system more reliable and energy-saving.

Optimizing Brushless DC Motor Performance with INEED Hall Sensor Solutions
Adjusting Sensor Sensitivity for Better Response
Changing how sensitive Hall sensors are can help motors work better. First, make sure the sensors are calibrated correctly. This step matches the sensors to the rotor’s magnetic field. It helps them detect position changes more accurately. Use a multimeter to check the sensor’s voltage during this process. This ensures the motor controller gets accurate data for smooth running.
Check how the sensors are placed. If they are not positioned right, they may not work well. Keep them at the right distance from magnets to avoid problems. Adjust the sensitivity if the motor works in very hot or cold places. Some sensors let you change their settings for temperature changes. These tweaks help the motor respond quickly to speed or load changes.
Keeping Stability in Fast Motors
Fast motors need to stay steady to avoid problems. Hall sensors help keep them stable. Make sure the sensors are tightly secured to stop vibrations from affecting them. Use a 3D-printed holder or similar tool to keep them in place. Check that the sensors line up with the rotor magnets. If they don’t, the motor may act strangely, especially at high speeds.
For better stability, use sensors that react quickly. These sensors can detect rotor changes fast, helping the motor adjust smoothly. If the motor is in a noisy area, add a DC amplifier to the sensor circuit. This reduces noise and keeps the motor stable, even at high speeds.
Improving Motor Efficiency with Hall Sensor Data
Data from Hall sensors can help make motors more efficient. Watch the sensor readings to find patterns in how the motor works. Use this information to adjust the motor’s speed and torque. For example, if the motor struggles with heavy loads, change the torque settings to make it stronger.
Check the sensor data often to find any problems. Sudden changes in readings might mean the sensors are misaligned or worn out. Fixing these issues quickly keeps the motor efficient. You can also use the data to save energy, like by using regenerative braking. This improves how the motor works and makes it last longer.
Tip: INEED’s brushless DC motors have built-in Hall sensors. These make it simple to track and improve performance. Their advanced design ensures they are efficient and reliable for many uses.
Leveraging INEED Brushless DC Motors for Optimal Results
INEED brushless DC motors have smart features to boost performance. Learning to use them well can improve your system’s efficiency.
1. Pick the Best Motor for Your Needs
Choose a motor that fits your project. INEED offers many brushless DC motors, some with built-in Hall sensors for better control. Think about these factors:
Voltage Options: Pick 12V or 24V models based on your power source.
Torque Needs: High-torque motors handle heavy tasks, while small ones fit tight spaces.
Speed Requirements: Motors with speeds up to 80,000 RPM are great for fast tools like medical devices.
Tip: INEED can customize motors for you. Adjust gear ratios or output shafts to match your project.
2. Install and Align the Motor Correctly
Good placement helps the motor run smoothly. Align it with your system’s load to reduce wear and save energy. Use INEED’s small designs, like the 6mm motor, for tight spaces. Secure the motor tightly to lower noise and stop vibrations.
3. Use Hall Sensor Data to Check Performance
INEED motors with Hall sensors give real-time rotor position updates. Use this data to adjust speed and torque settings. Check sensor readings often to catch problems early. This keeps the motor working well for longer.
Note: INEED motors are strong and need little maintenance, making them great for long-term use.
By following these tips, you can get the most out of INEED brushless DC motors. Their smart features and custom options make them perfect for industries like robotics and healthcare.
Troubleshooting Hall Sensor Issues in Brushless DC Motors
Finding and Fixing Misalignment Problems
If Hall sensors are misaligned, the motor may not work well. This can cause uneven torque, strange noises, or even motor failure. To check for misalignment, watch how the motor runs. If it seems unstable or noisy, the sensors might not be lined up with the rotor magnets.
Here’s how to fix it:
Check Sensor Placement
Make sure the sensors are spaced evenly, usually 120 electrical degrees apart. Use a ruler or template to measure the distance. Misplaced sensors can make it hard for the motor to detect the rotor’s position.Adjust the Sensors
Move the sensors so they match the rotor magnets perfectly. Use a plastic tool to avoid damaging the parts. Secure the sensors tightly to stop vibrations from moving them out of place.Test the Motor
After adjusting, spin the rotor by hand or with a slow driver. Watch for smooth operation. If the motor still acts up, repeat the alignment steps until it works properly.
Tip: Check sensor alignment often, especially if the motor vibrates a lot. This simple step can prevent bigger problems later.
Fixing Wiring and Connection Problems
Bad wiring can mess up signals from Hall sensors, making the motor less efficient. To fix this, carefully check the wires and connections.
Follow these steps:
Inspect the Wires
Look for broken or loose wires. Check the connectors to make sure they are firmly attached.Use Testing Tools
Use tools like a multimeter to check the wires for problems. You can also use thermal imaging to find hidden defects. These tools help you spot issues quickly.Fix or Replace Damaged Wires
If wires are broken, replace them with new ones of the same type. Cover exposed wires with heat shrink tubing to avoid short circuits.Test the Connections
After fixing the wires, use a multimeter to check if everything is connected properly. Make sure the readings match the motor’s wiring diagram.
Note: Always double-check the wiring diagram. Using the wrong one can cause more problems.
Checking and Replacing Broken Hall Sensors
A broken Hall sensor can make the motor behave oddly, like changing speed suddenly or losing torque. Fixing or replacing the sensor is important to get the motor working again.
Here’s what to do:
Review the Wiring Diagram
Look at the motor’s wiring diagram. Pay attention to wire colors and connector positions. Wrong wiring can seem like a sensor problem.Test the Sensors
Check the sensors at different points, like the control board or connectors. Use a multimeter to measure voltage and resistance. If a sensor shows an open circuit, it’s likely broken.Replace the Broken Sensor
Find the faulty sensor and remove it carefully. Install a new sensor with the same specs. Secure it and reconnect the wires.Test the Motor
After replacing the sensor, test the motor while it’s running. Make sure the new sensor works correctly.
Tip: If you’re unsure about replacing the sensor, ask a professional for help. This ensures the job is done safely and correctly.
By solving these common problems, you can keep your motor running smoothly. Regular checks and quick fixes will save you time and money while extending the motor’s life.

Common Challenges with INEED Brushless Gear Motors and Solutions
INEED brushless gear motors are built to be reliable and efficient. However, like all advanced machines, they can face problems. Knowing these issues and how to fix them helps your motor work better. Below are common problems and simple ways to solve them.
1. Torque Problems While Running
Torque problems can make it hard for the motor to handle heavy tasks. This often happens because of bad gear alignment or not enough lubrication.
How to Fix It:
Check Gear Alignment: Open the motor and look at the gears. Make sure they are lined up correctly. Misaligned gears can cause uneven torque.
Lubricate the Gears: Add good-quality gear oil to reduce friction. Don’t use too much oil, as it can collect dirt.
Test Under Load: After fixing, test the motor with its usual tasks. Check if the torque is steady.
Tip: Inspect the gears every three months to avoid torque issues.
2. Too Much Noise While Running
Loud noise, over 30dB, can be a problem in quiet places. This is usually caused by worn gears or loose parts in the motor.
How to Fix It:
Inspect the Gears: Check for damage like broken teeth. Replace bad gears with INEED-approved ones.
Tighten Loose Parts: Use a screwdriver to secure screws and bolts. Loose parts can make vibrations louder.
Add Noise-Reducing Pads: Place pads around the motor to lower sound levels.
Note: If the noise doesn’t stop, contact INEED’s support team for help.
3. Motor Overheating
Overheating can damage the motor and make it less efficient. This happens when the motor runs too hard or doesn’t have enough airflow.
How to Fix It:
Check Operating Limits: Make sure the motor is running within its voltage and speed limits. Look at the datasheet for details.
Improve Airflow: Keep the motor in a ventilated area. Add a cooling fan if needed.
Inspect Wires: Loose wires can cause overheating. Use a multimeter to check and fix them.
Reminder: Let the motor rest after long use to avoid overheating.
4. Trouble Connecting to Smart Systems
Some users find it hard to connect INEED motors to smart devices. This is often due to software issues or wrong wiring.
How to Fix It:
Check Compatibility: Make sure your smart system works with the motor’s protocols. INEED motors work with most IoT platforms.
Follow Wiring Diagrams: Use the provided diagram to connect wires correctly. Double-check your work.
Update Software: Make sure your smart system has the latest updates. Old software can cause problems.
Tip: INEED offers help for smart system setups. Contact their team for advice.
5. Low Efficiency in High-Torque Tasks
The motor may lose efficiency when handling heavy loads. This can happen due to worn gears or not enough power.
How to Fix It:
Check Power Supply: Ensure the motor gets enough voltage and current. Use a stable power source.
Replace Worn Gears: Look for gear damage and replace bad parts. INEED’s planetary gearboxes work well for heavy tasks.
Balance the Load: Don’t overload the motor. Spread the weight evenly to keep it efficient.
Note: INEED can customize motors for heavy-duty tasks. Contact their team for options.
6. Motor Stopping Suddenly
A motor that stalls or stops can disrupt work. This often happens because of blocked gears or broken Hall sensors.
How to Fix It:
Check for Blockages: Open the motor and look for debris in the gears. Remove anything stuck carefully.
Test Hall Sensors: Use a multimeter to check the sensors. Replace broken ones with INEED-approved parts.
Reset the Controller: Turn off the motor and restart the controller. This can fix temporary stalling.
Reminder: Clean the motor regularly to avoid blockages.
7. Customization Challenges
Customizing INEED motors can feel tricky without clear plans. This often happens due to unclear needs or lack of technical knowledge.
How to Fix It:
List Your Needs: Write down what you need, like torque, speed, and size. Clear details make customization easier.
Ask INEED for Help: Share your CAD files with their team for advice. They can help you avoid design mistakes.
Test Prototypes: Try out prototypes to see if they meet your needs before finalizing.
Tip: INEED offers free samples for testing custom designs.
By solving these problems, you can keep your INEED motors working well. Regular care, proper setup, and using INEED’s support services will help your motor last longer and perform better.
Setting up, improving, and fixing Hall sensors correctly is very important. These steps help brushless DC motors run smoothly and last longer. They also make sure the motor detects positions accurately. By using this guide, you can make your motor work better and face fewer repair problems.
Tip: Check out INEED’s advanced brushless DC motors and gear motors. They come with built-in Hall sensors and can be customized for different uses. Visit INEED Motors to learn how their products can improve your motor systems.
FAQ
What happens if Hall sensors are not aligned correctly?
If Hall sensors are not lined up right, the motor may act strangely. It could make odd noises, have uneven torque, or become unstable. To fix this, move the sensors so they match the rotor magnets. Use a ruler to check the spacing. They should be spaced 120 electrical degrees apart.
Tip: Check sensor alignment often to avoid motor problems later.
How do you test if a Hall sensor is working?
To test a Hall sensor, use a multimeter to check its voltage. Attach the multimeter to the sensor’s output wire. Slowly spin the rotor and watch the voltage. It should change as the rotor moves. If it doesn’t, the sensor might be broken.
Reminder: Always turn off power before testing for safety.
Can you replace a Hall sensor yourself?
Yes, you can replace a Hall sensor with simple tools. Take out the broken sensor and put in a new one with the same specs. Reconnect the wires carefully. After replacing, test the motor to make sure it works well.
Note: If you’re unsure, ask an expert to help you.
Why does the motor overheat during operation?
The motor might overheat if it’s overloaded, has bad airflow, or loose wires. Check the motor’s limits to make sure it’s not working too hard. Keep the area around the motor ventilated. Look for damaged or loose wires and fix them.
Tip: Let the motor rest after long use to stop overheating.
How do Hall sensors improve motor efficiency?
Hall sensors help motors run better by giving exact rotor position data. This helps control speed and torque more accurately, saving energy. They also allow features like regenerative braking, which makes motors last longer and use less power.
Emoji Insight: ⚡ Save energy and make motors last longer!


