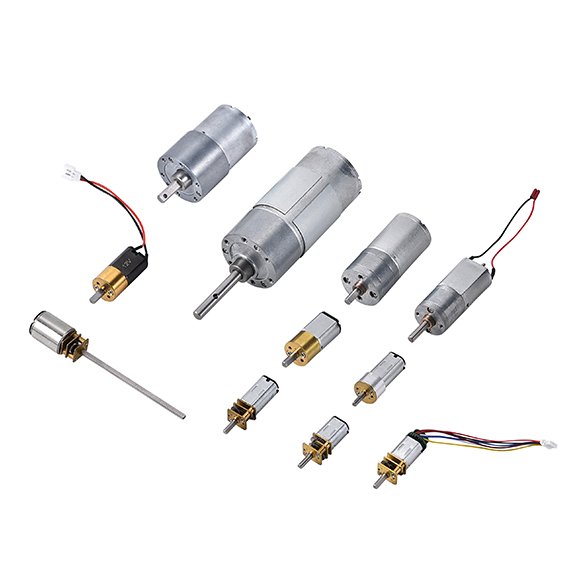
Carbon brushes for small electric motors are crucial for their operation. They transfer electricity to the motor’s spinning components, ensuring optimal performance. Over time, these brushes can wear out due to heat, dryness, or the use of incorrect types. Worn carbon brushes for small electric motors can lead to issues such as copper dust, grooves on parts, or reduced motor power. If these problems are neglected, they can result in motor damage or complete failure.
Replacing old carbon brushes for small electric motors is essential to avoid costly repairs. Regularly checking brush springs and maintaining good conditions can extend their lifespan. With basic tools, you can ensure your motor continues to run smoothly and reliably.
Key Takeaways
Check carbon brushes often for wear or damage. Finding problems early stops motor troubles and expensive fixes.
Use the right type of carbon brushes for your motor. Wrong brushes can cause overheating and harm the motor.
Keep the motor clean to make carbon brushes last longer. A clean motor works better and wears out parts less.
Signs Your Carbon Brushes Need Replacement
Weak motor power or poor performance
When carbon brushes wear out, the motor may slow down. It might not deliver the same power as before. This happens because worn brushes can’t keep a strong electrical connection. If you need steady power for tasks, this can be annoying. Checking for weak performance early helps fix the issue sooner.
Strange sounds or sparking near the motor
Odd noises like grinding or clicking can mean brush trouble. These sounds happen when brushes lose contact with moving motor parts. Sometimes, you might even see sparks near the motor’s commutator. Sparks show the brushes aren’t working right. Ignoring these signs can damage the motor, so act quickly.
Tip: If you see sparks, turn off the motor right away. Check the brushes to avoid serious damage.
Brushes look worn or broken
Looking at the carbon brushes is a good way to check them. Take them out and see if they are much shorter than before. Cracks, chips, or other damage mean they need replacing. Using damaged brushes can harm the motor’s commutator and shorten its life. Replacing them quickly keeps the motor running well.
Note: Always use brushes that fit your motor’s requirements. Wrong brushes can cause more problems.
Tools and Materials for Replacing Carbon Brushes
You need a few simple tools to replace carbon brushes. Having everything ready makes the job faster and easier.
Basic tools like screwdrivers and pliers
Use screwdrivers to open the motor and reach the brushes. Pick a flathead or Phillips screwdriver, depending on your motor’s screws. Pliers help pull out old brushes, especially if they’re stuck. Needle-nose pliers work well because they are precise and easy to handle.
Tip: Use a small container to hold screws and tiny parts. This keeps them safe from getting lost.
Correct replacement carbon brushes for small electric motors
Get the right carbon brushes for your motor. Check the manual or motor details to find the correct size and type. Wrong brushes can harm the motor or make it work poorly. You can buy brushes at hardware stores or online, so finding them is simple.
Optional cleaning and safety supplies (e.g., gloves, air cleaner)
Cleaning and safety items can help but aren’t required. Gloves keep your hands clean from grease and dirt. Use a brush cleaner or compressed air to clear dust inside the motor. A clean motor helps the new brushes work better and last longer.
Note: Work in a bright area to see small parts clearly and avoid errors.
How to Replace Carbon Brushes in Small Electric Motors
Disconnect the motor from power
Make sure the motor is unplugged before starting. This step keeps you safe. Use a positive disconnecting means like a circuit breaker to cut power. Don’t trust buttons or switches to turn off the motor. They might not fully stop the electricity. After turning off the power, lock and tag the switch to stop anyone from turning it back on.
Check the motor with tools to confirm it’s safe to touch. A trained person should also try to start the motor to ensure it won’t run. These steps follow safety rules and protect you from danger.
Safety Tip: Wear gloves and goggles when working with electrical parts. Release stored energy before starting.
Locate and access the carbon brushes
Find the carbon brushes near the motor’s commutator or slip ring. Look at your motor’s manual to know exactly where they are. Use a screwdriver to open the motor’s cover or panel. Put screws and small parts in a container so you don’t lose them.
Once you see the brushes, check for dust or dirt around them. Clean the area with compressed air or a brush cleaner. Work in a well-ventilated space to avoid breathing in carbon dust.
Pro Tip: Take a picture of the motor’s inside before taking it apart. This will help you put it back together later.
Remove the worn brushes carefully
Take out the old carbon brushes gently. If they’re stuck, use needle-nose pliers to pull them out without breaking anything. Look for cracks, chips, or if the brushes are too short. Throw away the old brushes following local waste rules.
Before adding new brushes, clean the contact areas to remove dirt. This helps the motor work better and last longer.
Note: Only trained people should handle electrical parts. Check the Material Safety Data Sheet (MSDS) for safe handling and disposal.
Install the new brushes in the correct orientation
Put the new carbon brushes into their holders. Make sure they fit and move easily. Line them up with the motor’s commutator or slip ring. Wrong placement can cause problems. Use clips or springs to secure the brushes in place.
Check that the brushes are touching the commutator firmly. This is important for the motor to work well.
Reminder: Always use brushes that match your motor’s size and type. Wrong brushes can overheat or wear out quickly.
Reassemble the motor and test its functionality
Close the motor’s cover or panel and tighten all screws. Unlock and remove the tag from the power switch, then turn the motor back on. Watch how it runs.
Make sure it works smoothly, has steady power, and doesn’t make strange noises or sparks. If everything looks good, the job is done. If not, check your work or ask an expert for help.
Final Tip: Check your motor often to keep the carbon brushes and other parts in good shape.
Tips to Maintain and Extend the Lifespan of Carbon Brushes
Check brushes and motor parts often
Look at the carbon brushes regularly to spot problems early. Check for cracks, chips, or if they’ve gotten shorter. Also, inspect the commutator and springs for any damage. Doing this on a schedule helps you find issues before they get worse.
Motor Type | Check Frequency |
|---|---|
Older Motors | Every 3 months |
Newer Motors | Every 6 months |
This table is about locomotives, but it works for small motors too. Regular checks stop sudden breakdowns and help your motor last longer.
Tip: Write down inspection dates and what you find. This helps you plan repairs or replacements.
Keep the motor clean and clear of dirt
A clean motor works better and protects the carbon brushes. Dirt and grease can block the brushes from working properly. Use these cleaning tips:
Clean grease and dirt with safe cleaning liquids.
Vacuum dust using plastic vacuum tools.
Try dry ice blasting for deep, gentle cleaning.
Cleaning your motor often makes it last longer. Research shows clean motors fail less and save energy. A clean motor also helps brushes last longer, saving you money.
Pro Tip: Look at motors to see if they need cleaning. Clean them as soon as you see dirt.
Don’t overload the motor while using it
Too much load can harm the motor and its carbon brushes. Overloading makes the motor hotter and wears out the brushes faster. Always use the motor within its limits. If it struggles, lower the load right away.
Reminder: Check the motor’s manual for its load capacity. Staying within limits keeps the motor and brushes in good shape.
By following these steps, you can make your carbon brushes last longer and keep your motor working well.
Changing carbon brushes helps your motor work better and last longer. Use this guide to save money and keep your motor in good shape.
Reminder: Check your motor often to avoid expensive fixes. Replace old brushes as soon as you notice wear.
Taking care of your motor ensures it stays dependable for a long time.
FAQ
What happens if I don’t replace worn carbon brushes?
Old brushes can make the motor work poorly or overheat. They might also harm the commutator. If ignored, repairs could be expensive or the motor might stop working completely. Change them quickly.
How often should I check my motor’s carbon brushes?
Look at the brushes every 3 to 6 months. How often depends on how much you use the motor. Regular checks help you find problems early and avoid sudden motor failures.
Can I use any carbon brush for my motor?
No, you must use brushes that fit your motor. Wrong brushes can make the motor overheat or work badly. They might even damage the motor’s parts. Read the manual to pick the right ones.


