Specifying Noise Limits and test methods for spur gear systems protects your product from unwanted sound issues. You need a clear specification process to avoid confusion and ensure consistent results. Noise affects specification compliance, user safety, and product quality. Specification gives you control over gear motor performance. Specification defines noise metrics such as sound pressure level, frequency spectrum, and vibration. Specification also determines test methods like microphone placement, sound level meter readings, and environmental controls. Specification sets the foundation for reliable noise measurement. Follow each specification step to achieve accurate results.
Noise metrics include:
Sound pressure level (dBA)
Frequency spectrum
Vibration
Test methods:
Microphone placement
Sound level meter readings
Environmental controls
Key Takeaways
Identify the right noise standards for spur gear systems to ensure compliance and meet user expectations.
Specify gear parameters like tooth contact ratios and machining tolerances to control noise levels effectively.
Define test conditions, including operating speeds and environmental factors, to achieve accurate and repeatable noise measurements.
Select appropriate noise testing instruments and ensure proper calibration to collect reliable data.
Document and analyze results thoroughly to improve gear designs and meet noise specifications.
1. Identify Noise Standards
You need to start by identifying the right standards for your spur gear systems. This step helps you avoid compliance issues and ensures your product meets user expectations. Standards set the rules for how you measure and limit noise. They also guide you in choosing the right test methods.
Research Industry Standards
You should research industry standards before you set any noise limits. These standards come from organizations like ISO, AGMA, and DIN. They give you clear rules for measuring noise and reporting results. You will find that industry standards cover topics like sound pressure level, frequency spectrum, and vibration.
ISO 6336 and AGMA 6000 are common industry standards for gear noise.
European Union standards include REACH and RoHS, which affect both design and reporting.
North American and Asia-Pacific standards may have different requirements, so you must check them carefully.
High contact ratio helical gears are the quietest, operating up to 10 dB quieter than standard spur gears.
Standard helical gears operate at 85-95 dBA.
Non-involute spur gears are the noisiest, often exceeding 95 dBA.
Tip: Always compare international and regional standards. International standards often require stricter controls than local ones.
Select Relevant Regulations
You must select the regulations that apply to your market and application. This step ensures your spur gear systems meet all legal and customer requirements. International standards often differ from regional ones. For example, the European Union requires strict compliance with environmental and product safety standards. North America and Asia-Pacific regions may have different rules. You need to understand these differences to avoid costly redesigns or recalls.
Here are some common challenges you may face when specifying noise limits, along with solutions:
Challenge | Solution |
|---|---|
Noise generated during gear engagement | Determine the type of noise and discuss with the design team and suppliers. |
Asymmetric gear noise spectrum | Use high-quality helical gearing and optimized gear engagement to minimize vibration. |
Low contact ratio leading to increased noise | Design gears with a higher contact ratio and optimized geometry for quieter operation. |
Manufacturing and assembly errors | Analyze gears as a system to improve microgeometry and reduce noise. |
Vibration from gear mesh and motor operation | Optimize entry and exit points of gears to reduce vibration and noise. |
You should always align your noise limits and test methods with the standards that fit your application. This approach gives you a strong foundation for the rest of your noise specification process.
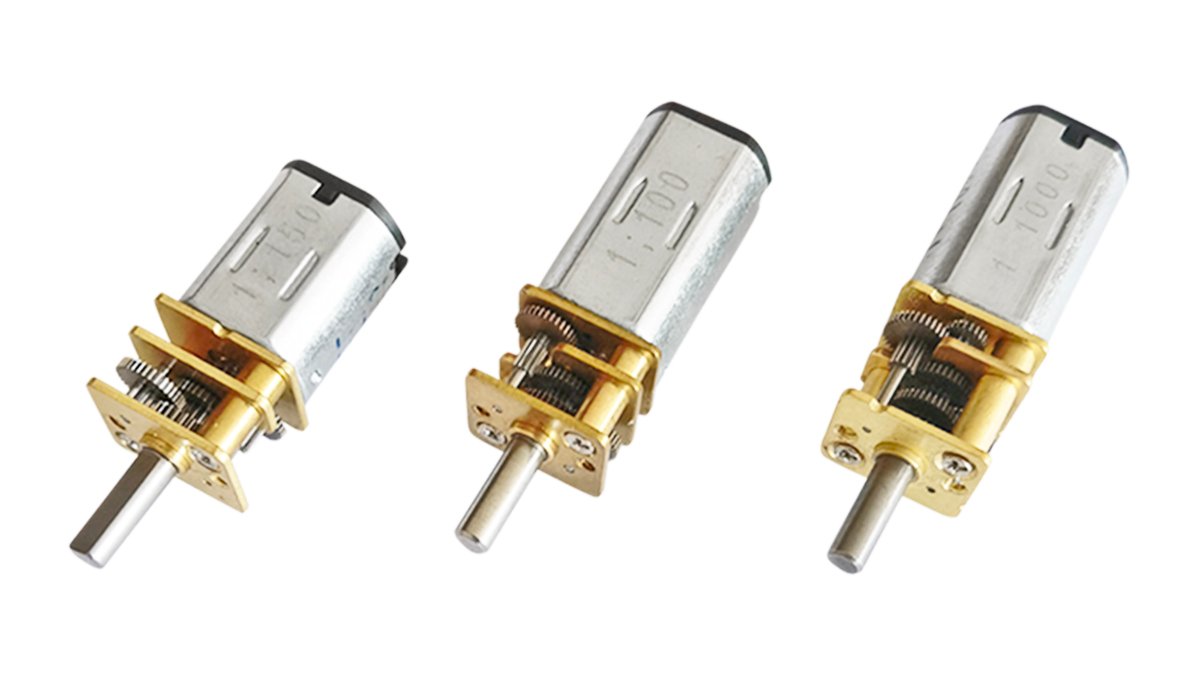
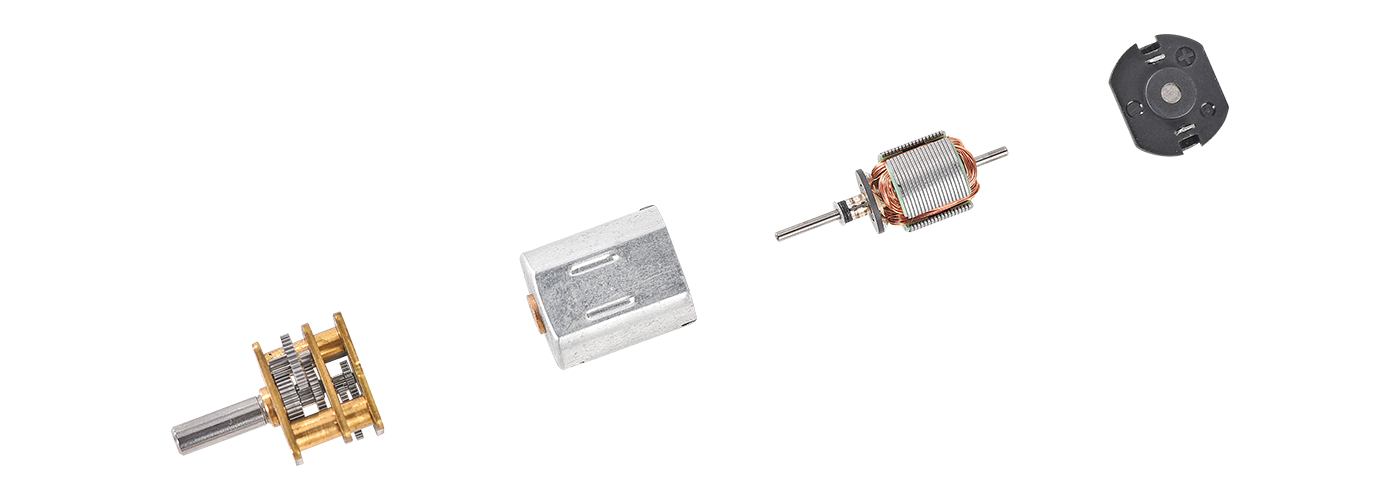
2. Specify Spur Gear Systems Parameters
You must specify spur gear system parameters to control noise levels and achieve reliable results during test conditions. Gear design choices directly affect how much noise your motor produces. When you define these parameters, you set the stage for accurate testing and quieter operation.
Define Gear Profiles and Tooth Contact Ratios
You need to pay close attention to gear profiles and tooth contact ratios. These features play a major role in noise generation.
Different gear profile types can be modified to prevent interferences caused by shaft, bearing, and case deflection during meshing and separation.
Adjustments to the tip or flank of gear teeth are crucial for high-load and high-speed gears. These changes help minimize noise during test conditions.
Machining tolerances influence noise levels. Better tolerances can reduce noise, even in lower-quality gears.
Higher tooth contact ratios reduce dynamic loads and noise in gear systems.
Gearbox vibrations from dynamic loads cause most of the noise.
Transmission error is a major source of vibration and noise. Reducing transmission error improves gear performance during test conditions.
Tip: Always optimize tooth contact ratio and gear profile for your application. This reduces vibration and improves noise control.
Document Key Design Parameters
You should document all key design parameters that impact noise emissions. This step ensures you can repeat test conditions and achieve consistent results.
Teeth profiles
Machining tolerances
Backlash
Dynamic response of the case
Material selection also affects noise levels. Surface hardening improves load capacity and reduces transmission error. Tighter AGMA quality grades and proper lubrication lower noise in spur gear applications.
Evidence Type | Description |
|---|---|
Gear Design Characteristics | Spur gears engage abruptly, leading to higher noise and vibration. |
Material Selection Impact | Surface hardening reduces transmission error and mitigates noise. |
Quality Control Measures | Tighter AGMA grades and lubrication significantly reduce noise levels. |
You must record these parameters for every gear motor you test. This practice helps you compare results and refine your designs for quieter operation.
3. Define Test Conditions
You must define test conditions before you measure noise in spur gear motors. Test conditions set the stage for accurate and repeatable results. You control the variables that affect noise, such as speed, load, and environment. This step helps you compare results across different gear designs and applications.
Set Operating Speeds and Loads
You need to specify the operating speeds and loads for your test. These parameters affect how much noise your gear motor produces.
Select a range of speeds that matches real-world use.
Choose loads that represent typical and extreme conditions.
Record each speed and load during testing.
Use a table to organize your test parameters.
Test Parameter | Example Value | Purpose |
|---|---|---|
Speed (RPM) | 1500, 3000 | Simulate operation |
Load (Nm) | 5, 10 | Test under stress |
Tip: Always test at multiple speeds and loads. This practice helps you find noise peaks and weaknesses in your gear design.
Note Environmental Factors
You must monitor environmental factors during noise testing. Temperature and humidity can change measurement accuracy.
Record temperature and humidity for every test session.
Keep conditions as stable as possible.
Use advanced sensors, such as Chromatic Confocal Sensors, to reduce errors caused by environmental changes.
Slight variations in temperature and humidity can impact your results:
Humidity levels recorded during testing: 60.4%RH at 20.2 °C, 60.2%RH at 21.2 °C, 59.8%RH at 20.5 °C.
These small changes show why you must monitor and control your environment.
Note: Controlled conditions improve the reliability of your noise measurements. You reduce errors and make your results easier to compare.
You set the foundation for accurate noise testing when you define speeds, loads, and environmental factors. This step ensures your spur gear motor tests produce results you can trust.
4. Select Noise Testing Instruments
You need the right instruments to measure noise in spur gear motors. Accurate tools help you collect reliable data and compare results across tests.
Choose Microphones and Sound Level Meters
You should select microphones and sound level meters that match your test needs. These devices capture the sound produced by your gear motor. Look for these features:
Sound level meters with a broadband frequency response from 2 Hz to 40 kHz.
High dynamic range, usually from 10 dB to 140 dB, to cover quiet and loud sounds.
Standard 1-inch microphones with a frequency range of 20 Hz to 12 kHz and sensitivity between 40 dB and 14 dB.
Before you start measuring, always calibrate your microphones. Calibration ensures your readings are accurate. You should follow the manufacturer’s instructions for distance and direction when placing the microphone. This practice helps you avoid distortion and get the correct sound pressure level.
You can trust your results when you use the right equipment and follow proper setup steps.
Consider Data Acquisition Tools
You also need data acquisition tools to record and analyze noise signals. These tools collect data from your microphones and sound level meters. You can use:
Digital recorders for storing sound samples.
Data acquisition systems with software for real-time analysis.
Computers with specialized programs to visualize frequency and amplitude.
Choose tools that let you export data for further study. This step makes it easier to share results with your team or compare different tests. Reliable data acquisition tools help you spot trends and improve your gear motor designs.
5. Establish Measurement Points
You need to establish measurement points to capture accurate noise levels from your spur gear motors. This step helps you set clear noise limits and ensures your test methods produce reliable results. You must decide where to place microphones and follow guidelines for positioning. These choices affect the repeatability of your measurements and help you compare noise limits across different gear designs.
Determine Microphone Locations
You should select microphone locations that best capture the noise levels produced by your gear motor. Place microphones near the main noise sources, such as the gear mesh or motor housing. Use a table to organize your measurement points:
Measurement Point | Typical Location | Purpose |
|---|---|---|
Gear Mesh Area | Close to gear teeth | Detect gear noise levels |
Motor Housing | Near casing surface | Monitor overall noise |
Output Shaft | Adjacent to shaft exit | Measure transmitted noise |
Tip: Place microphones at multiple points to record noise levels from different parts of the motor. This practice helps you set accurate noise limits and identify areas that need improvement.
Follow Positioning Guidelines
You must follow positioning guidelines to ensure your noise measurements are consistent. The tilt angle of the microphone plays a key role in capturing noise limits. Studies show that a microphone tilted at 60° can detect low-amplitude chatter without loss. This angle improves the reliability of your noise measurements and helps you identify instability in gear motors.
Keep microphones at a fixed distance from the noise source.
Use the same tilt angle for each test to maintain repeatability.
Avoid placing microphones too close to walls or reflective surfaces.
Note: Consistent microphone positioning lets you compare noise levels across tests and set reliable noise limits for your spur gear motors.
You improve the accuracy of your test methods when you establish measurement points and follow proper guidelines. This step helps you control noise limits and achieve quieter gear motor designs.
6. Define Noise Limits
Noise metrics help you measure and control sound from spur gear motors. You use decibels (dBA) to quantify sound pressure level. Frequency describes how often vibrations occur, and amplitude shows the strength of the noise. These metrics let you compare gear designs and set clear limits.
Common test methods for measuring noise metrics:
Place microphones near gear mesh and motor housing.
Use sound level meters to record dBA values.
Analyze frequency spectrum with digital recorders.
Monitor vibration using accelerometers.
Set Acceptable dBA Thresholds
You must set clear dBA thresholds for your spur gear motors. These thresholds define the maximum noise level your product can produce. You choose values based on gear type and application. The table below shows typical ranges for different gear types:
Gear Type | dBA Range |
|---|---|
High Contact Ratio Helical | 80-85 dBA |
Standard Helical | 85-95 dBA |
High Contact Ratio Spur | 85-95 dBA |
Standard Spur | 85-95 dBA |
Non-involute Spur | >95 dBA |
You should aim for lower dBA values in consumer products. Industrial applications may tolerate higher noise levels, but you still need to meet safety and comfort standards. Setting strict thresholds helps you avoid complaints and ensures compliance.
Tip: Always check your thresholds against industry standards and customer expectations.
Align Limits with Application Needs
You must align noise limits with the needs of your application. Adjusting gear design and assembly can help you reach your targets. Consider these strategies:
Adjust teeth profiles to avoid interferences caused by deflections during gear meshing.
Improve machining tolerances to reduce noise, even in lower-quality gears.
Manage backlash to prevent excessive noise, especially in high-speed motors.
Stiffen transmission shafts to lower dynamic loads and improve teeth alignment.
Increase case thickness to enhance dynamic response and reduce noise emissions.
Evaluate the balance between weight and project requirements when making design changes.
You improve noise control when you match limits to your application. You protect product quality and user experience by using these strategies.
7. Prepare Testing Environment
A well-prepared testing environment gives you accurate and repeatable noise measurements. You must control outside sounds and keep your setup the same for every test. This step helps you compare results and spot real changes in gear motor noise.
Control Ambient Noise
You need to keep outside noise as low as possible during testing. Unwanted sounds can change your results and make it hard to measure gear motor noise. You can use several methods to control ambient noise:
Method | Description |
|---|---|
Gear Design Optimization | Change gear shape to reduce noise at the source. |
Material Selection | Pick materials that absorb vibrations and lower noise. |
Lubrication Practices | Use special lubricants to cut friction and reduce sound. |
Bearing Maintenance | Check and fix bearings often to stop extra noise from wear or damage. |
Vibration Isolation | Add mounts that block vibrations from spreading to other parts of the test area. |
Acoustic Enclosures | Place soundproof covers around the gear motor to trap and lower noise. |
Tip: Always test in a quiet room with doors and windows closed. Turn off fans, phones, and other machines that could add background noise.
You should also measure the background noise level before each test. If the background noise is too high, wait until it drops or move to a quieter space.
Ensure Consistent Setup
You must keep your test setup the same every time. This practice helps you trust your results and compare tests. Follow these steps for a consistent setup:
Place the gear motor in the same spot for each test.
Use the same type and position for all microphones.
Keep the distance between the microphone and gear motor fixed.
Set up cables and equipment the same way each time.
Record the temperature and humidity before starting.
Note: Small changes in setup can cause big changes in noise readings. Write down your setup steps in a checklist and follow them for every test.
A controlled environment and a steady setup help you get clear, useful data from your noise tests. You can then make better choices about gear design and noise control.
8. Calibrate Instruments
You must calibrate your instruments before you start noise testing on spur gear motors. Calibration ensures your measurements are accurate and repeatable. If you skip this step, you risk collecting unreliable data that can mislead your analysis of motors. Follow these steps to prepare your equipment for testing.
Perform Pre-Test Calibration
Check Manufacturer Guidelines
Read the instructions for each instrument. Every device has unique calibration steps.Use a Reference Sound Source
Place a calibrator on the microphone. Set it to a known sound pressure level, such as 94 dB.Adjust Sound Level Meters
Turn on the sound level meter. Adjust the reading until it matches the reference value.Inspect Data Acquisition Tools
Make sure your data recorders and software show the correct values.Repeat for All Microphones
Calibrate every microphone you use for testing. This step keeps your results consistent across all motors.
Tip: Always calibrate your instruments in the same environment where you will test your motors. This practice reduces errors from temperature or humidity changes.
Record Calibration Data
You need to keep a record of every calibration. This log helps you track the accuracy of your instruments over time. Use a table like the one below to organize your data:
Instrument | Calibration Date | Reference Level | Result (dB) | Operator |
|---|---|---|---|---|
Microphone 1 | 2024-06-01 | 94 dB | 94.1 dB | J. Smith |
Sound Level Meter | 2024-06-01 | 94 dB | 93.9 dB | J. Smith |
Write down the date, reference level, and result for each instrument.
Note the operator who performed the calibration.
Review your records before every testing session on motors.
Note: Good calibration records help you spot problems with your instruments. You can fix issues before they affect your motors testing results.
You improve the reliability of your noise testing when you calibrate and document your instruments. This step gives you confidence in your measurements and helps you compare motors across different testing sessions.
9. Run Noise Testing

You have set up your environment and calibrated your instruments. Now, you need to run the noise test on your spur gear motor. This step helps you see how your motor performs under real conditions.
Operate Motors Under Test Conditions
You should operate the motor using the same speeds, loads, and environmental settings you defined earlier. This practice gives you results you can trust. Always follow a checklist before starting:
Power on the gear motor.
Set the speed to your first test value.
Apply the correct load.
Monitor temperature and humidity.
Check that all microphones and sensors are active.
You can use different types of testing to get a full picture of your motor’s performance. The table below shows two common methods:
Testing Type | Description |
|---|---|
Use a sound level meter to measure noise levels during operation. Compare your results with standards. | |
Vibration Testing | Use a vibration sensor to detect abnormal vibrations. Analyze the data for possible problems. |
Tip: Always let the motor run for a few minutes before you start recording. This step helps you avoid errors from cold starts.
Collect Noise Data
You need to collect noise data at each test point. Start your data acquisition system and record the sound levels. Use the following steps:
Record the dBA value at each speed and load.
Save the frequency spectrum for later analysis.
Note any unusual sounds or vibrations.
Repeat the test for each measurement point.
You should organize your data in a table or spreadsheet. This practice makes it easy to compare results and spot trends.
Note: Accurate data collection helps you find the source of noise and improve your gear motor design.
You complete this step by following your test plan and recording all results. You now have the data you need for analysis and reporting.
10. Analyze and Document Results
Interpret Noise Measurements
You need to interpret your measurement data to understand the acoustic emissions from your gear motors. Start by reviewing the sound pressure level readings at each test point. Compare these values to your audible noise specification for the gear case noise. Look for patterns in the frequency spectrum and amplitude. These patterns reveal how noise generation changes with speed, load, and environment.
Use statistical indicators to make sense of your acoustic data. The table below shows common methods for analyzing acoustic emissions and vibration signals from gear motors:
Statistical Indicator | Type of Signal Applied | Description |
|---|---|---|
F1 to F26 | RAW, RES, DIFF, FSB | General indicators for pitting growth |
F27, F28 | RES | Specific indicators for residual signals |
F29 to F34 | DIFF | Designed for difference signals |
F35, F36 | FSB | Tailored for first-order sideband signals |
You should use these indicators to track changes in sound pressure level and vibration. This approach helps you spot early signs of gear wear or failure. Always check for spikes in acoustic emissions, as these may signal problems with gear noise reduction or electric motors.
Tip: Use time, frequency, and time-frequency analysis to get a full picture of your gear motors’ acoustic emissions.
Prepare Test Reports
You must prepare a clear test report after you finish your measurement and analysis. A good report helps you share results and improve your noise specifications for future gear motors. Include all essential elements in your report. The table below lists what you should document:
Element | Description |
|---|---|
Engineered for small gears, measures noise and temperature. | |
Measurement Techniques | Uses NI PXI 4472 system and AP 7046 microphone for sound pressure level measurement. |
Analysis Methods | Examines signals in time, frequency, and time-frequency space with LabView software. |
Temperature Measurement | Uses infrared camera Optris Xi80 to monitor gear temperature during tests. |
Noise Minimization | Applies soundproof acoustic foam to reduce electric motors’ acoustic emissions. |
Testing Environment | Conducts tests in a semi-anechoic chamber to limit outside acoustic noise. |
Quality Checks | Checks gears for quality and mounts them carefully before testing. |
Running-in Phase | Runs gear motors for 30 minutes to reach stable operating conditions before measurement. |
You should also include your audible noise specification, test methods, and any steps taken for gear noise reduction. List the sound pressure level, vibration, and acoustic emissions for each test. Add notes about any unusual audible noise or vibration analysis results. This practice ensures your report supports future improvements in gear design and electric motors.
Note: A detailed report helps you track trends in acoustic emissions and supports better noise specifications for your gear motors.
You gain reliable results when you follow each step for noise specification and testing.
You ensure compliance with industry noise standards and regulations.
You enhance user experience by reducing discomfort and hearing risks.
You improve product quality by finding and fixing noise sources.
Research shows that integrating noise control in machinery design boosts product quality and user satisfaction. Collaboration between engineers leads to better machine performance and cost savings. You set clear noise metrics and use proven test methods to meet expectations and quality standards.
FAQ
What are the main noise metrics for spur gear motors?
Noise metrics help you measure sound and vibration. The most common ones include:
Sound pressure level (dBA)
Frequency spectrum
Vibration amplitude
You use these metrics to compare gear designs and set noise limits.
Which test methods should you use for noise measurement?
You should use these test methods:
Place microphones near the gear mesh and motor housing.
Record dBA values with a sound level meter.
Analyze the frequency spectrum with digital tools.
Monitor vibration using accelerometers.
Tip: Always follow industry standards for reliable results.
Why does microphone placement matter during testing?
Microphone placement affects your noise readings. You should keep microphones at a fixed distance and angle from the noise source. This practice helps you get consistent and accurate results every time you test.
How often should you calibrate your noise testing instruments?
You should calibrate your instruments before every test session. Regular calibration ensures your measurements stay accurate and reliable. Always record calibration data for future reference.
What can you do if your gear motor exceeds noise limits?
You can adjust gear profiles, improve machining tolerances, or use better lubrication. Sometimes, changing the material or adding acoustic enclosures helps. Review your test data to find the main noise source and make targeted improvements.